I think it's high time I posted a how-to hack! In an attempt to avoid the temptation of the January sales, I decided to distract myself from sales temptations by implementing a headboard makeover (thus spending the best part of a week covered in paint and thread and therefore barely presentable in my own living room, let alone retail outlets). But I digress.
Before I began, I was left with this:

The previous tenant in my rented room was also a keen interiors-er and had constructed this rather snazzy creation out of some good ol' MDF and an assortment of supportive struts - it houses all my art and craft supplies in pull-out trolleys and even has a section for my boyfriend's clothing (I, of course, have two full wardrobes elsewhere in the room whilst the long-suffering chap has been relegated to a tucked-away rail up top). But the colour wasn't really doing it for me and I longed for a comfy back to rest up against. Plus I'd just inherited some fabulous curtains (a leftover make from a photoshoot) I subsequently customised with slick, chunky black ribbon along the vertical edges, which I was keen to refer to visually elsewhere in the room to help tie the look together.
So I did this:

It's not quite pink enough to upset the boyf but is such a glorious shade it's all I can do to keep from licking it to see if it tastes as good as it looks (I used Designer's Guild Mulberry). By painting the routed lines black, rather than keeping them the same colour, the whole structure really seems to come to life and all its handcrafted joints are lovingly highlighted, plus it echoes the lines of said fab curtains.
For those reading who don't happen to be renting a room from a former interior designer who kindly left handmade MDF structures upon his departure, however, here's a couple of ideas that could be adapted to work in any space:
1. Feature wallpaper stripe.

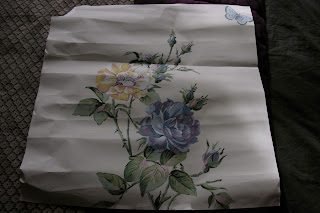
A quick and easy way to get a shot of colour and pattern into any space. I used some leftovers of this flock-tastic wallpaper from Colefax and Fowler and simply stuck it straight onto the headboard unit using double-sided tape, taking care to pattern-match all five sections required to fill the line. Easy peasy. You could use this method to add a stripe in an alcove, or even stick some to a piece of wood to make bespoke artwork. Still not loving my inherited light fitting but until I'm struck with an ingenious idea for customising that too it'll stay as is.
2. Padded headboard

Another bargain hack (not that I ever do expensive ones, but even still) - through using fabric and upholstery nail strips already in my collection, my only expense was getting a piece of foam cut (which cost around £10 from Pentonville Rubber), which I measured to fill the width of my bedframe and end just shy of the inverted shelf on the headboard unit. I then attached some raspberry silk around the whole foam piece, holding it in place with pins poked through both the foam and fabric.

Then for my feature fabric - a vintage piece of sari fabric I used as a net curtain in a previous flat. After pinning this taut at the back I stitched it straight at the front to hold it in place, before adding my somewhat triumphant finishing touch - upholsterer's nail strip, usually used to trim solid furniture, which I salvaged from a bin (OK, it was a bin at a photoshoot as these were the leftovers from some "proper" upholstering - but a crafty find nonetheless). As luck would have it, by splicing all the leftover bits together I had just enough to cover both sides and it really pulled the whole look together. A simple bit of stitchwork was enough to hold this in place.

And as with the wallpaper, the whole thing is (miraculously, somehow) held in place with some trusty double-sided tape - again, this should also work sticking/leaning the foam directly to a wall, or onto a simple sheet of wood for extra support.

I now sleep far more sweetly basking in the glory of my hack - it also proves to be a much comfier vantage point from which to dream up the multitude of further hacks I have earmarked for the space. I'm getting twitchy fingers just thinking about it...






 Posts
Posts


